Tricks Of The Trade - Gear Prop Stylists Need
(Banner image by: Justin Tsucalas of Prop Up Shop Bmore; Authors: Limonata Creative + Liz Watt)
5 THINGS YOU DIDN’T KNOW YOU NEEDED TO KNOW ABOUT PROP STYLING
Styling may seem like a breeze, but trust me, beautiful images don’t create themselves. And let me tell you, this job is no joke. Photo shoots can take hours--sometimes over multiple days or weeks. You have to schlep tons of heavy props back and forth, and you need to be ready for anything come shoot day. But fear not, I’m going to give you a few tips and tricks. These will help you avoid a few classic stumbling blocks newbies trip over, so you can feel more confident shimmying into the world of professional prop styling.
1. Be prepared with a prop kit
First thing’s first: build yourself a prop kit--or a “MacGyver kit” as I like to call it. This is a tool box or bag filled with all the nitty gritty, must-have items that make your life easier on set. It’s one of the best ways to impress your clients when they ask “do you have that thing to do xyz to this other thing?” Since I do a range of prop styling (food & beverage, interiors, product, lifestyle, interiors, and video) my kit includes a ton of items that can help with all those types of projects.
Don’t get caught in a sticky situation at a shoot wishing you had thought to bring that one little item that could solve whatever problem has come up. Trust me when I say, there is no such thing as being too prepared. So, do yourself a major favor and pack yourself up a handy little bag of tricks so you’re never (rarely? Let’s go with rarely) stuck in a jam on the job.
My go to items are:
Ticky Tak - the perfect problem solver for most of your wall-hanging needs, or to stick a thing on that other thing.
Wooden skewers - multi-functional, but particularly amazing for food shoots and to prop things up.
Hand held steamer - because there’s seriously nothing worse than unintentionally wrinkled textiles.
Gaffers tape (black & white and in multiple widths) - helps you hide unsightly wires (or pretty much anything else you don’t want creeping into the photos), is heavy duty but leaves less sticky residue on props you may need to return than duct tape, and is super multi-functional for pretty much all of your taping needs.
3-M picture hanging strips - command strips: do I even need to say more?
Various Paint Brushes - Paint brushes are helpful to, well, BRUSH of course! I’m constantly using them to brush off crumbs, dust and any other little bits of debris off objects on set before the camera takes that hero shot. Also super helpful to brush on oils or water on food / glassware when needed.

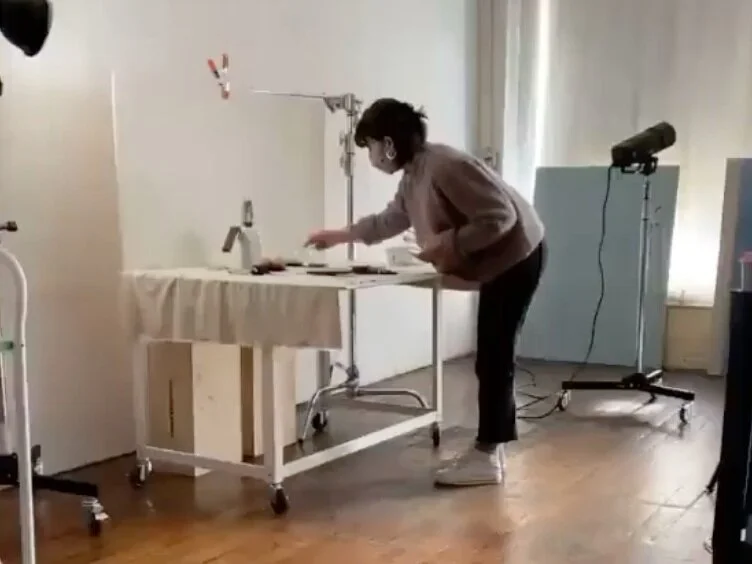
Me putting those paintbrushes to work in a cocktail shoot in 2018 with Tom McCorkle Images.
2. When it comes to footwear, it’s comfort all the way
You need comfy shoes! Seriously, you just do. Styling sounds glamorous but 90% of our work is quite the opposite - schlepping crates/boxes of props, working on your feet for 10+ hours a day, running around town on the hunt for specific items. I used to wear heels often before becoming a stylist - now, I’m a proud sneaker-wearer and I am not looking back! It may seem silly but you can actually tell the seasoned vs. unseasoned stylists apart just based upon their footwear… the newbies always learn the hard way :)
But you don’t have to sacrifice style for comfort, they’re not mutually exclusive. Here are my fav sneakers as of late (currently sold out, but any Sneak by Paul Green will make you look stylish while taking care of your tootsies!).
Me wearing my fav Paul Green sneaks on set this year!
3. Get yourself some wheels
Your body will thank you for it! In my first year of styling, I used to carry bags, boxes, and crates bursting with props on set. My body would legit scream at me from all the heavy lifting and carrying. Sure, it’s great exercise, but you can really hurt yourself and, let’s be honest, sometimes it’s just too much exercise. Eventually I got smart enough to buy myself a collapsible wagon and WE ARE INSEPARABLE. My wagon now lives in my car and is there to rescue me whenever I need it.
Here’s the one I use and love: my bestie.
Interior shoots and alllllll the boxes & objects that go along with it are NO JOKE! My wagon was crucial to getting all these puppies in here. Interior Design by Liz Marchant Ourston
4. Repeat after me: “Fingerprints are the enemy!”
Trust me: there is nothing worse than showing up to a product-based shoot only to discover every time you touch an item on set, you leave fingerprint marks everywhere. You might not think so, but they ALL show up on the camera footage, and then the photographer will be super annoyed with you because every print just means extra minutes of post-production that they have to spend editing those suckers out. And then they’ll NEVER hire you again! Ok, ok, maybe I’m being a little dramatic… but I swear, not by much! I’ve been there!
Because I tend to work with a lot of glass, metallic, or shiny objects that are all particularly prone to showing prints, I always keep a few packs of these white cotton gloves on me to prevent them.

Photo by Justin Tsucalas ; All glassware available to rent at Prop Up Shop Bmore
5. Do your research! Put yourself out there! You’ve got this!!
Unlike some other related creative fields such as photography, videography, etc., unfortunately there aren’t many (or any, really) resources for prop stylists to learn the trade before diving into it. The best way to learn if you have a knack for styling is to just jump right in and try it yourself.
I know this sounds scary, but trust when I say that it’s totally worth it. Here are a few steps you can take that will help along the way:
Do some online research. Unfortunately there isn’t a whole lot out there on styling, but take the time to do your due diligence and dig around for whatever information you can find. The more you know ahead of time, the better off you’ll end up being in the long run. I love this informative article by Emily Hendersen!
Reach out to other stylists and ask if they’d be willing to talk to you about what they’ve learned in their careers or offer you advice about the industry. You’d be surprised by how many people are willing to give their time to chat! Putting yourself out there is daunting, I know, and sometimes you may not get a response, but I promise that is never the end of the world and persistence always pays off. And the more you do it, the more you build your confidence. There really is nothing to lose!
Try to organize a relationship with a senior stylist where you work as their apprentice / assistant. Have I mentioned that styling is a lot of work? Ask around and see if there’s anyone in the industry who may need an assistant. They get some help with their projects and you get to learn the ropes and build experience - total win-win.
Reach out to photographers and ask if they’d like to collaborate on a project. A lot of the time, photographers and videographers are looking to grow their portfolios in between paid work, especially those who may be just starting out as well, so you may be able to organize a partnership where you both benefit.
Do your own styling projects & have them photographed professionally by a photographer. This can be costly, but it’s worth it. There is nothing better than having professional quality images of your work to really show off your skills and attract potential new clients.
Begin building your own portfolio and advertising it on a professional website, as well as on social media. Having a strong online presence in this day in age is so important. It’s the main way clients will find you and get a first impression of your work. While websites cost money, social media is free and, second only to word of mouth; there is no better free marketing than a strong Instagram profile. Take the time to learn how to use the platform and put your best foot forward by building a profile that you’re proud of. It will go a long way in building your business.

2016. This was the year it all began. My very 1st editorial photoshoot for Edible DC Mag and 2nd photoshoot EVER. It took me connecting with and befriending photographer Tom McCorkle Images (who took this photo) to get here. This was the launching pad for my original portfolio and the start of where I am now :) Best part? Tom and I are still good friends and even through he moved to Denver, CO this year, we’ve already worked on a shoot together (in Denver!) and plan to continue working together when the occasion arises.
Always remember: That if I can, then so can YOU friend.
